
Yeoman - 现代wepapp的脚手架(Getting started)
更新日期:
这是一篇边学边记录的实践笔记,
我尽量详尽的记录了整个实验的过程,
包括失败的尝试及解决问题的过程,
让没使用过的人,可以知道怎么解决问题,
也让我再碰到同样问题时,可以方便地查到。
作为一名初学者,以一名初学者角度所记录的笔记,
希望可以对其他初学者有益。
Yeoman是什么?
以下介绍翻译自Yeoman官方文档
Yeoman 帮助你创建个新项目,规定最佳实践和工具来帮助你保证项目富有生产性。
为了做到这样,我们提供了一个 generator(生产者) 生态系统。一个generator是一个脚手架的插件(我们可以用‘yo’命令来运行)用来完整你的项目或者构建有用的部分。
通过我们官方的generator,我们提出了”Yeoman 工作流”。这个工作流是一个健壮且固定的客户端栈,包括能帮助开发者快速建立完美的web应用的工具和框架。我们注意提供需要的来创建项目,屏蔽掉任何手动创建需要考虑的麻烦事儿。
用一个可以扩展的模块化的架构,我们利用成功的的案例和从几个开源社区学来的东西来保证这个开发人员使用的栈尽可能的智能化
作为一个坚信好的文档和卓越思想产生好的创建过程的团队,Yeoman还支持 lint,test,压缩及更多,因此开发者可以把注意力集中在解决问题上而不是担心这些小事情。
工具
Yeoman 工作流由三种类型的工具组成 当你创建一个web app时可以提高你的生产力和满足感:
脚手架工具 - yo
构建工具 - grunt、gulp、等等。
包管理工具 - 如 bower和npm
脚手架工具-yo
yo 脚手架建立一个应用,
你可能需要为你的项目配置grunt文件、注册grunt任务、处理bower依赖
构建工具-grunt、gulp
构建系统是被用来构建项目的,预览和测试你的项目,
grunt和gulp是两个时髦的选择
包管理工具-bower和npm
包管理工具被用做依赖管理,你不用再被迫的手动下载和管理你的脚本文件。bower和npm是两个时髦的选择
这三类工具被独立的开发和维护,但是作为我们规定的工作流的一部分,他们可以在一起工作的很好,让你的工作更有效率。
Yeoman工作流
Yeoman工作流有三个核心工具组成:
yo - 脚手架工具(来自Yeoman)
bower - 包管理工具
grunt - 构建工具
这些项目彼此间是由他们各自的社区独立维护的,但是作为我们规定的工作流的一部分,他们可以在一起工作的很好,让你的工作更有效率。
让我们来看看这些东东能用来做神马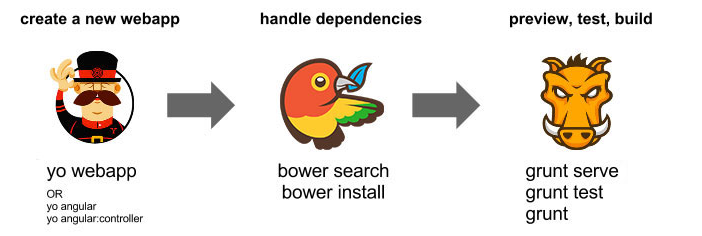
yo
yo是由Yeoman项目维护的,它提供web应用的脚手架,我们把可利用的脚手架模板称作generators,你可以通过npm典型的安装yo以及任何你想要并可以安装的generator。
用Yeoman搭建一个webapp的架子
安装yo和一些generator
以下实验环境为
windows7
node : 0.10.32
npm : 1.4.9
yo : 1.2.1
bower : 1.3.12
grunt-cli : 0.1.13
grunt : 0.4.5
关于node和npm的版本我已踩坑,给大家提个醒,如果你发现以下安装过程中出现类似错误: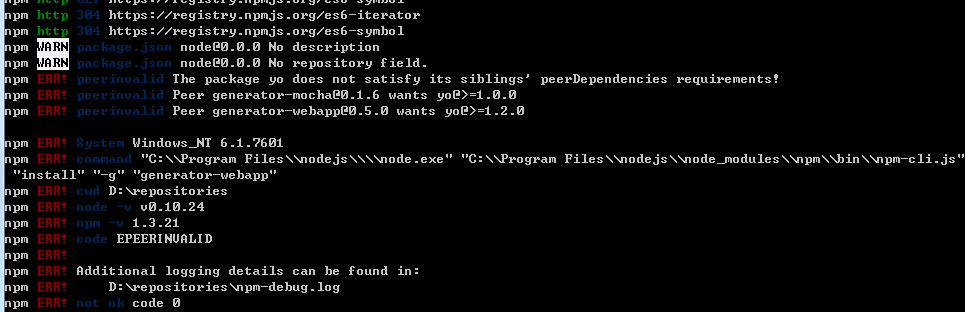
多半是因为node和npm该更新了…技术发展太快,也许今天写的这篇文章,在几个月之后就不适用了。
首先你需要安装yo和其他需要的工具
|
|

安装完成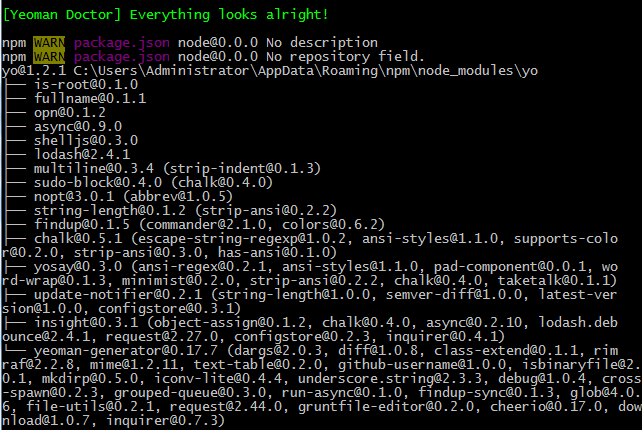
yo的命令行操作
1)通过help查看帮助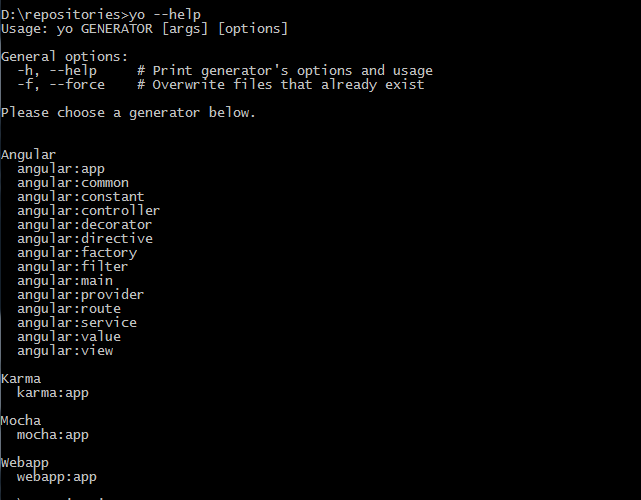
2)运行generator或查询yo的支持库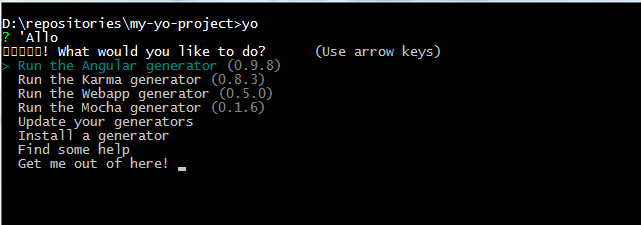
3)直接运行 yo webapp(generator的名字)
基本脚手架
为了搭建一个web应用,你会需要安装 generator-webapp 这个generator
|
|
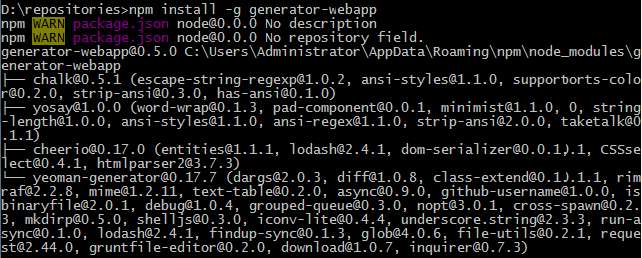
这是个默认的web应用 generator ,它会搭建出一个包含HTML5样板文件,jQuery,Modernizr,和 Bootstrap的项目。交互提示中你可以选择不要某些东西。
现在generator已经被安装了,为你的新项目创建一个目录
|
|

并运行 yo webapp 即可安装webapp这个generator
|
|
webapp generator 被认为是创建web app最简单的一种开始。我们也提供一些框架generator 可以被用作脚手架来产生一个项目及后来的view,models,controller (MVC?)等等
(你可以使用generator-webapp,当然你也可以使用其他的generator。官方文档还有个构建angular项目的例子,想试一下看这里:GETTING STARTED WITH YEOMAN)
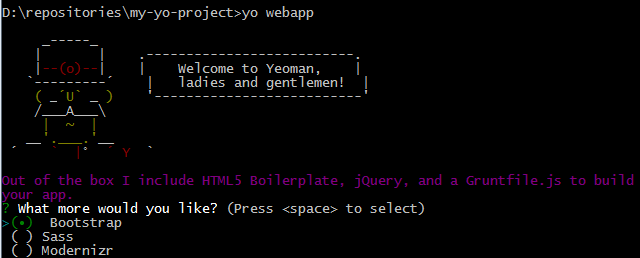
绿点点是选中哈,我都选上了哈试试看(sass是需要ruby环境的,如果你的电脑里没安ruby,会报错,报错详情见下方 = = 当然如果你是在项目中要使用sass的就另当别论,此处只引领新手快速使用Yeoman建立一个demo,重点不在sass上)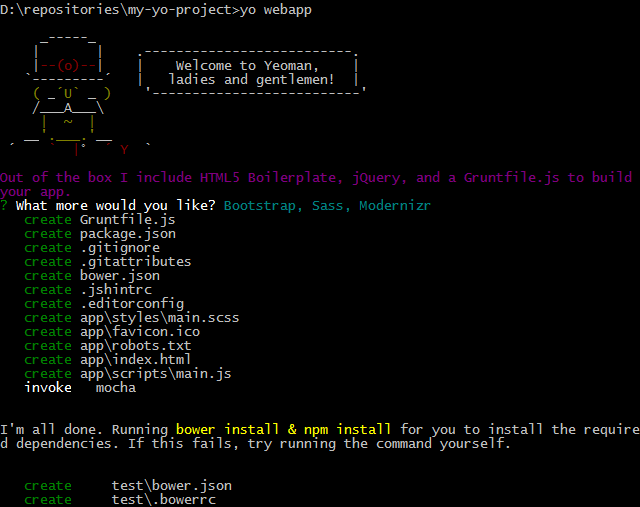
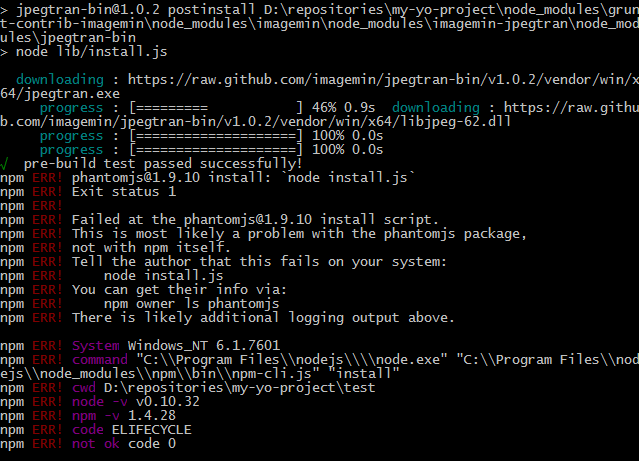
报错了,不过好像是phantomjs包的问题。先不管嘛。
现在看看你的目录中yeoman已经帮你把所需创建好了。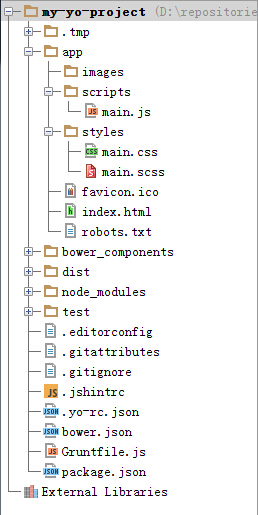
Bower
bower是一个为web提供的包管理工具,它可以让你为你的项目简单的管理依赖。这个包括一些有用的东西,如JavaScript,images ,CSS。它由Twitter和开源社区维护。
Bower的命令行操作
可以用以下命令实现用bower来管理包
|
|
我随便试一下下,先试下搜索
查出来的结果实在是太多了….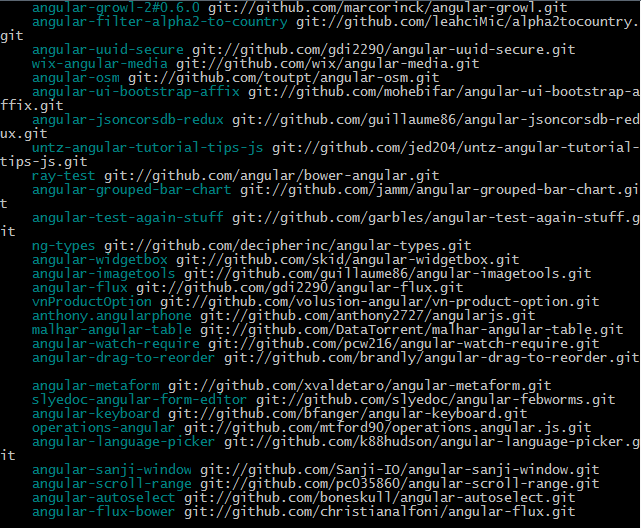
试一下查看现在有啥包
使用bower
在一个用yo做脚手架的项目中使用bower,创建一个基本的依赖于jquery插件的web app
|
|
相关文档:
grunt-bower-requirejs
grunt-bower-install(这里官方应该没有及时更新,名字应该是grunt-wiredep才对)
我们试着在使用yo做脚手架的项目中使用bower来为其添加个jquery-pjax的jquery插件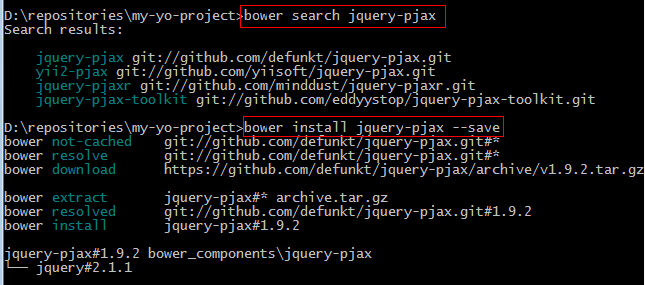
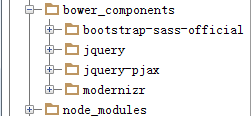
观察到bower.json里已经有了这个依赖 并且已经加到组件中咯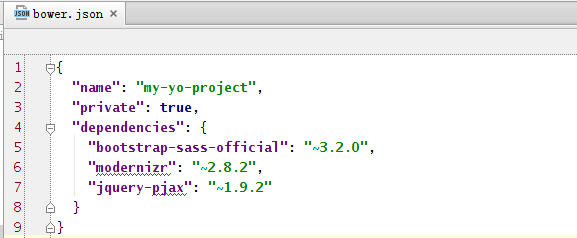
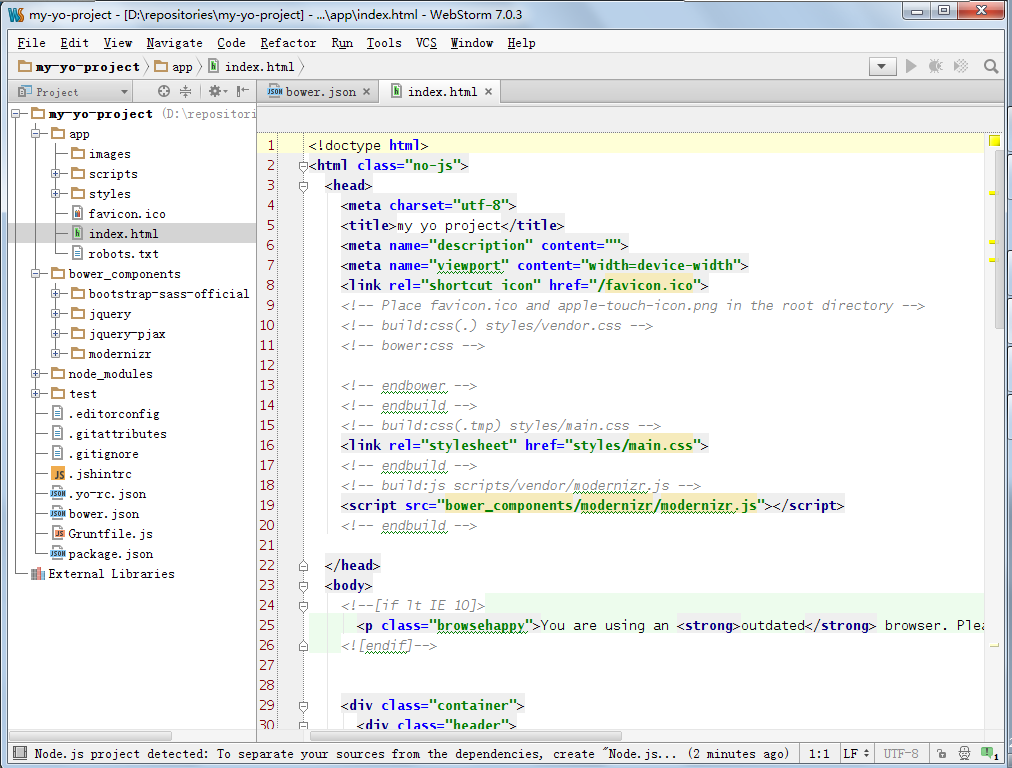
现在index.html中还没有bower的那些js的引用
先试一下文档上写的那个有误哈
我们按照grunt-wiredep文档上面的指示照做
安装grunt-wiredep
使用grunt-wiredep手动添加依赖(其实这步可省,因为之后grunt serve时候Yeoman会自动帮你做这件事)
我们要增加js依赖,所以在页面添加了
|
|
像酱紫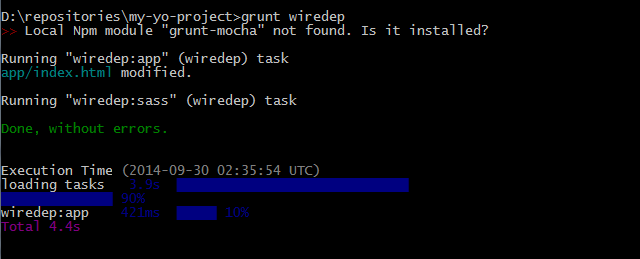
在这样执行命令
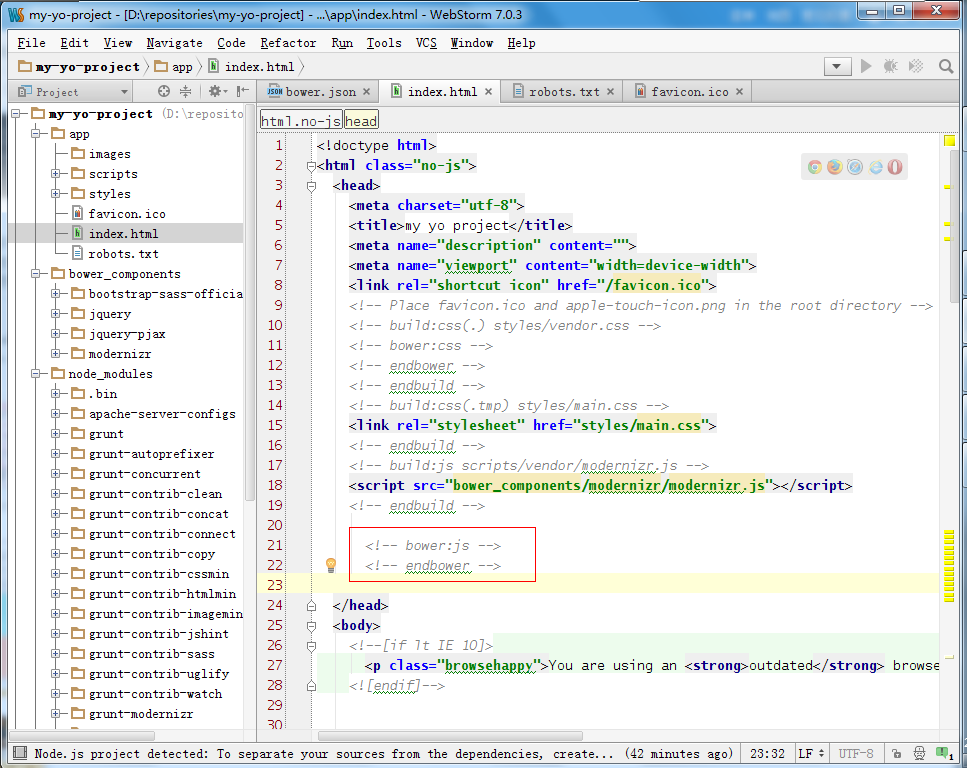
接下来我们发现在index.html文件已经添加进了js依赖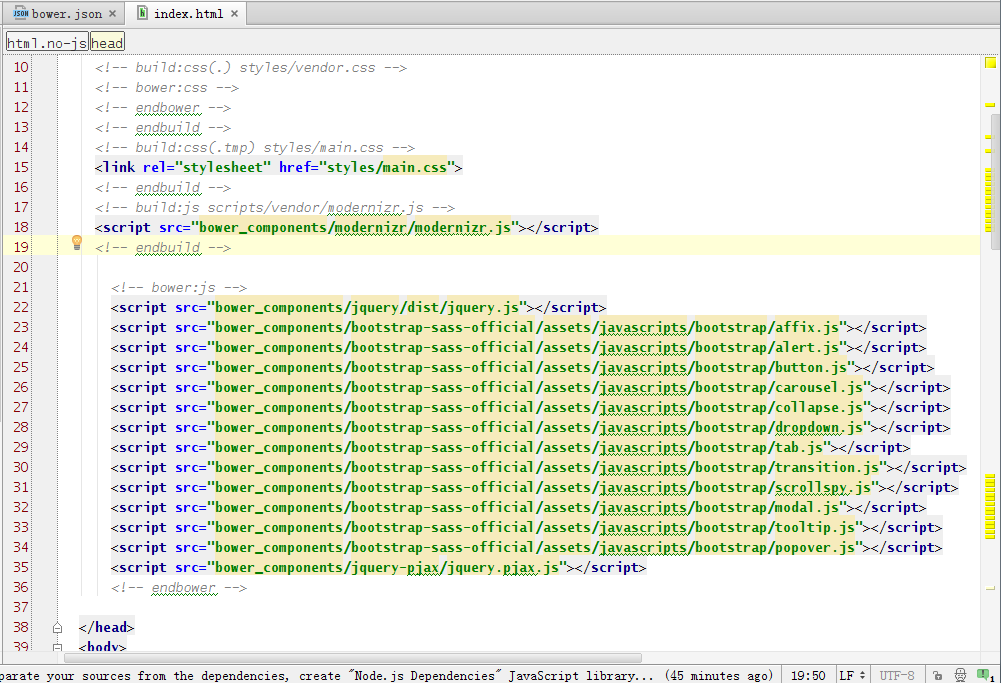
我们已经把bower.json文件里的依赖包涉及到的js全引过来了
grunt
grunt是一个为JavaScript项目服务的以任务为基础的命令行工具。他可以用来build项目,也暴露几个在你的工作流中用得到的命令。这些命令很多是利用由Yeoman团队来维护的grunt task。
grunt的命令行操作
|
|
这些命令可以和yo放在一起用,构成了一个无缝开发工作流
|
|
让我们先在gruntfile.js看一看 这些命令的细节
|
|
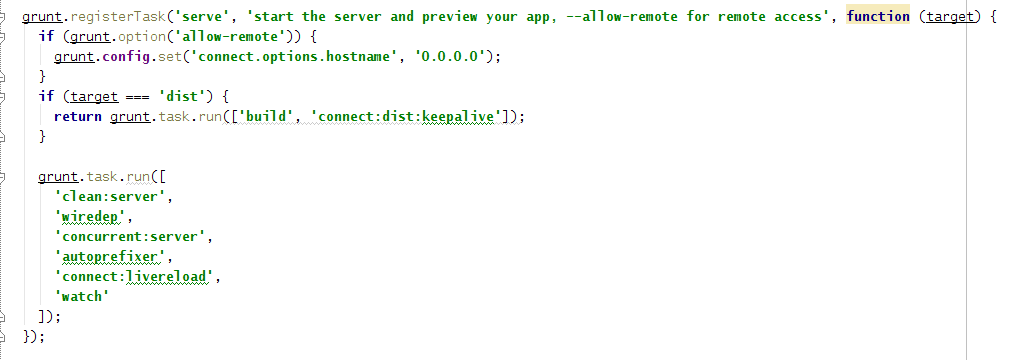
|
|
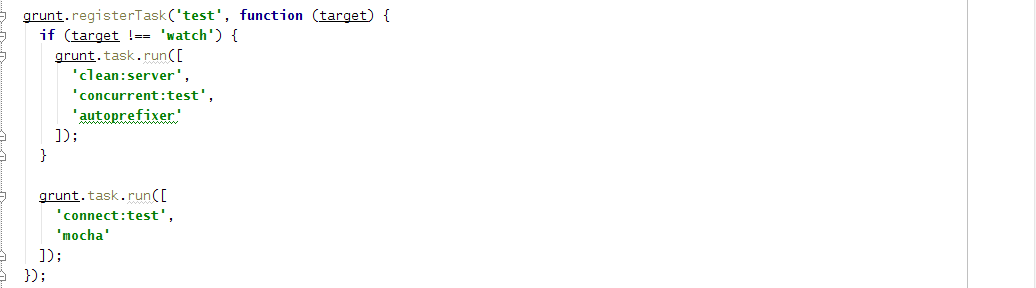
|
|

详细的自己去gruntfile.js里看吧,这么多东西都已经生成好了,我们只要直接用。
运行grunt serve (failure)
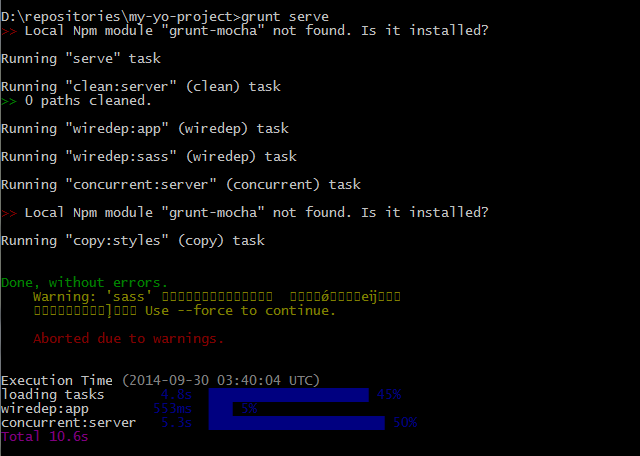
有错,因为sass需要Ruby环境,我没有安装Ruby环境,所以sass会有问题
我们强制启动 grunt
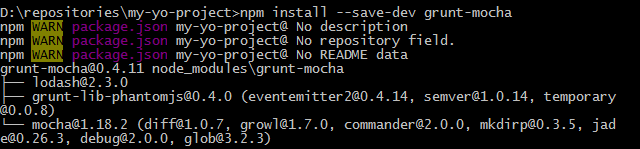
不过还是有错,上面有个grunt-mocha没安是吧,好像是因为yo webapp时候phantomjs安装失败了,那我们就重新搞。把两个都安上
在纠结了n久终于不报错了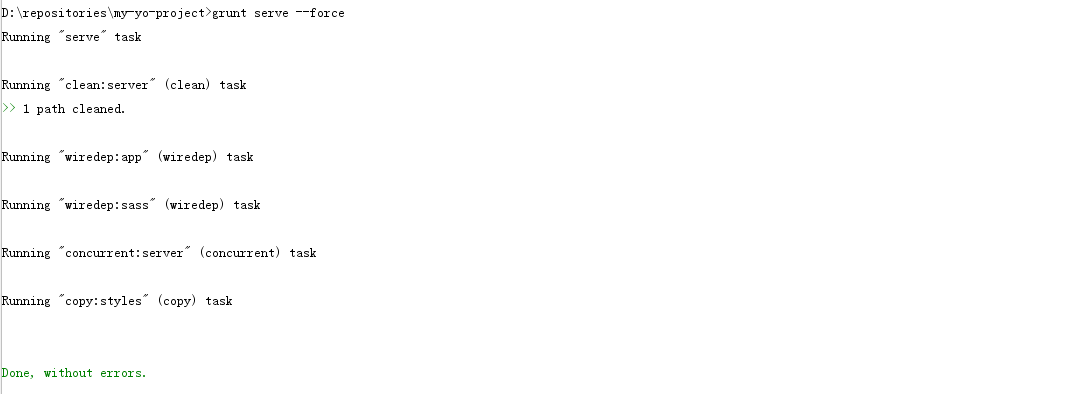
可是在那之后运行之后啥都没有也不报错,只有sass可能有问题了…
把gruntfile.js里所有带sass全部注释掉,再试试!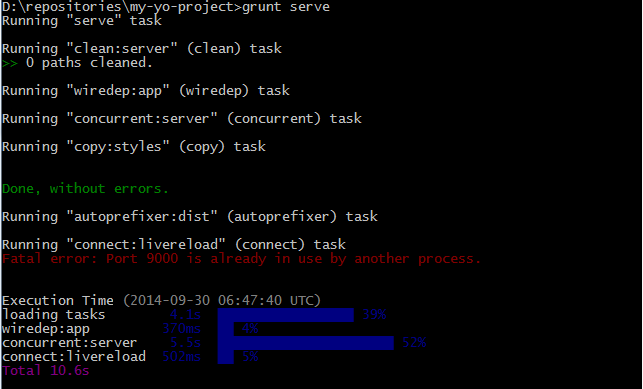
端口被占用的解决方法
终于有反应了,说是9000端口被占用了,我们看看9000端口被什么占用了
先来查看下 9000端口所在程序的PID
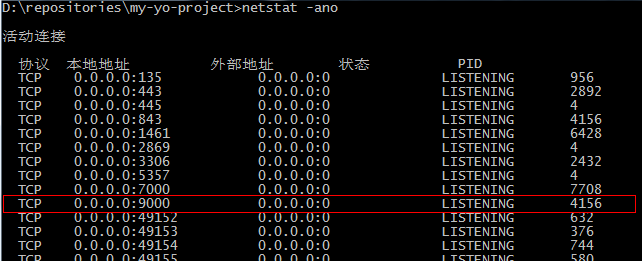
就是这个4156,我们打开任务管理器看看这个PID对应的是什么程序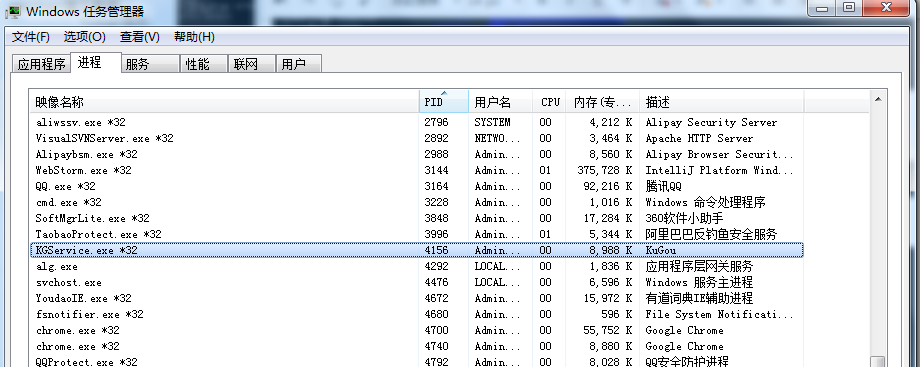
原来是我的酷狗,ORZ
先关掉酷狗吧,囧,其实你也可以改一下它默认的9000端口号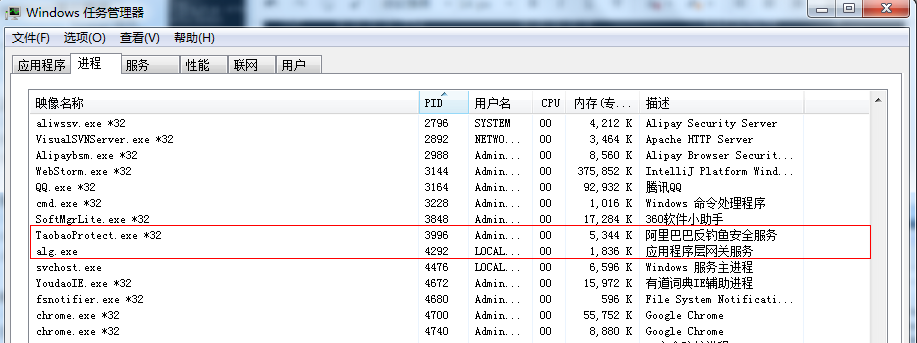
关了酷狗我们在任务管理器上面,找不到4156的应用了
所以我们试一下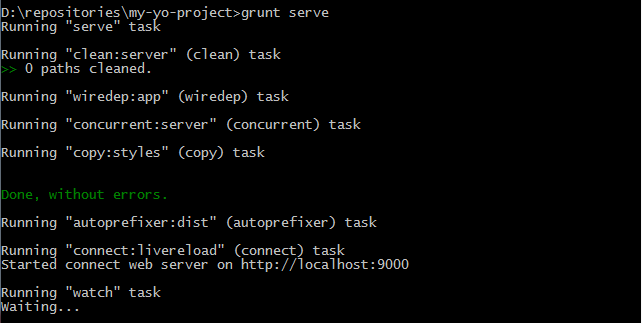
这回终于一切正常,并且它自己打开了网页,当当当当~~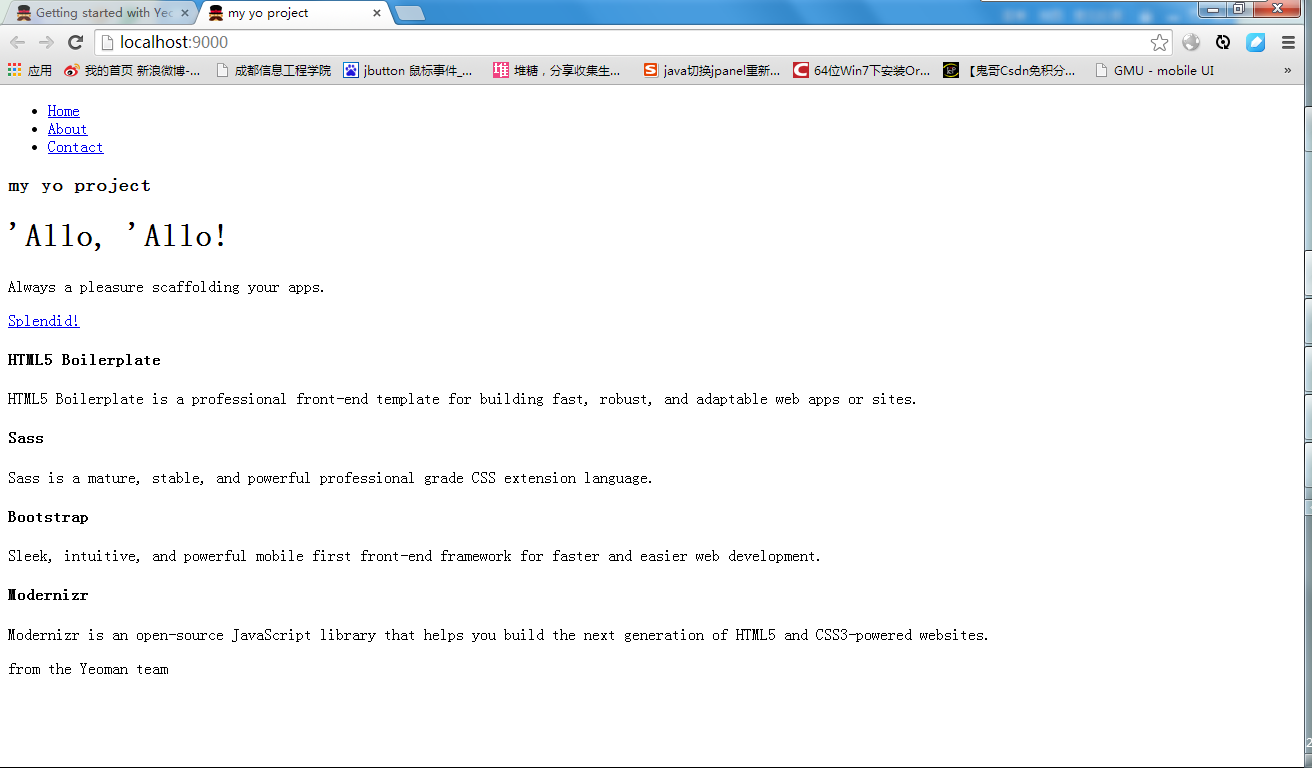
不过显示好像有点问题。
是个与CSS有关的错呀… 大概是和sass有关吧…
尝试把刚刚注释掉的sass相关的,再恢复下试试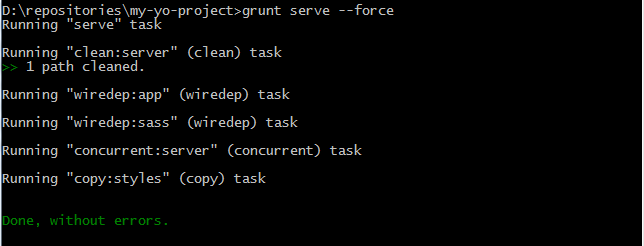
给跪,又变成这样半死不活的状态了
你可以安装Ruby和Sass
一旦有了Ruby,执行以下命令安装Sass:
|
|
就可以了~
当然如果不是非要用Sass,你也可以选择重装一次 webapp 脚手架 嘿嘿~
运行yo webapp
我重新运行yo webapp从头开始(直接在命令行里输入yo webapp就行了不需要删什么东西),
这次我重新选择我要的东西,这次我只选了bootstrap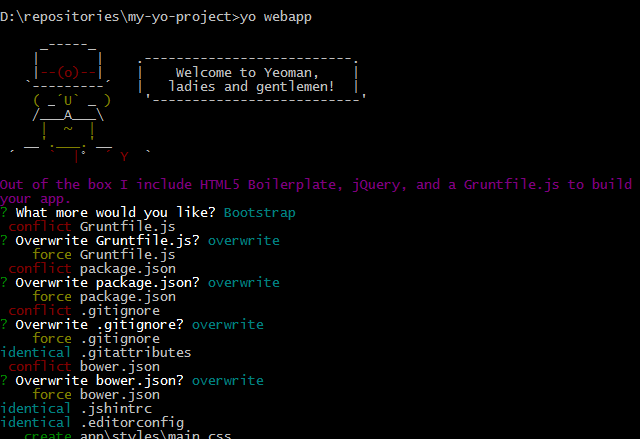
并根据提示重写了相关配置文件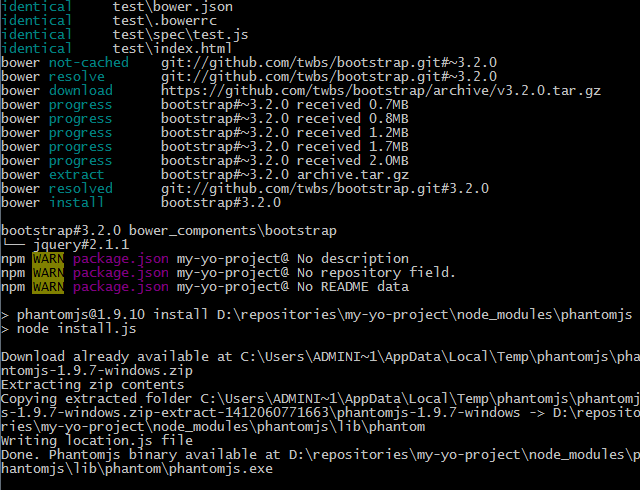
看起来一切正常
运行grunt serve (success)
越挫越勇的偶,再次坚强的启动了任务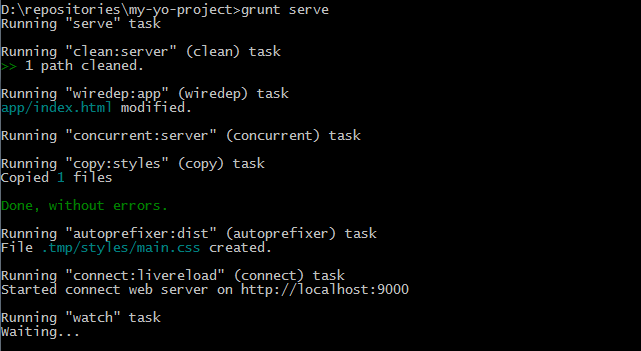
yeah,终于看到胜利的画面了!~真是太感动了∑(っ °Д °;)っ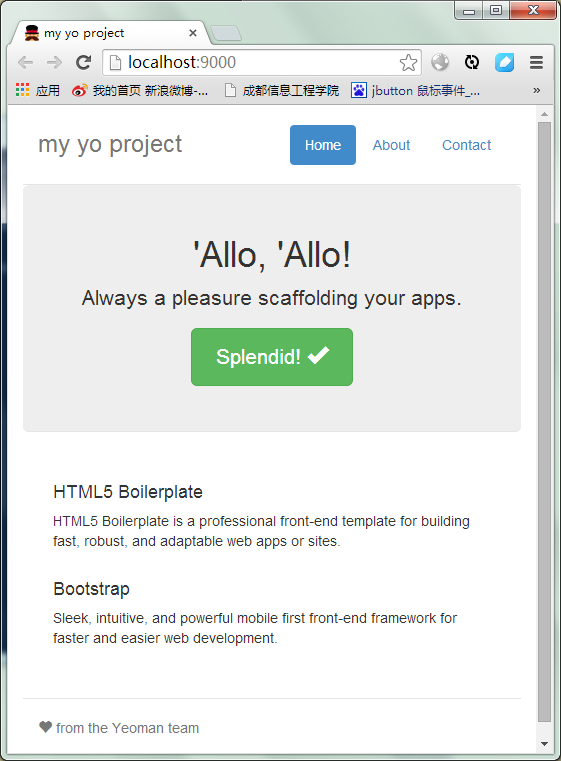
grunt test
给没使写过test的朋友简单试一下grunt test (如果你使用过,以下是相当简单的,不用看了)
因为现在测试里面啥也没有,test.js文件里的内容现在是这样的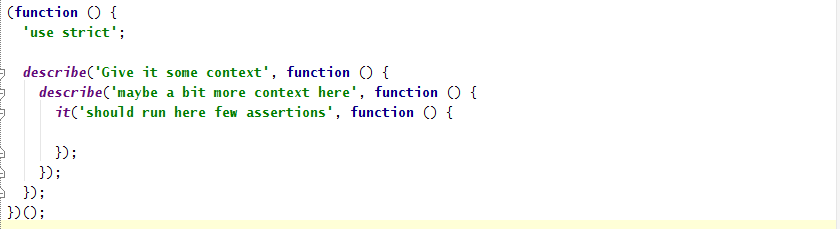
所以也不会有什么问题,一个空的测试全部通过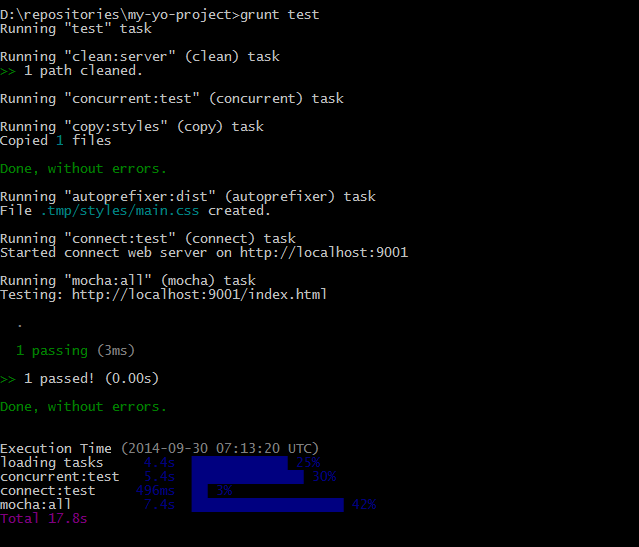
我们再修改test的文件试试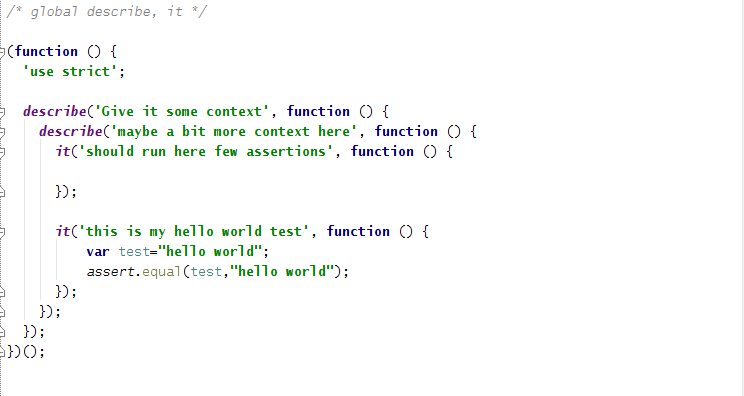
你可以这样写,我新增了一个测试用例,并判断这个“hello world”的字符串变量是不是等于
“hello world”,当然等于… 所以这是个必然会成功的测试用例,我们只是实验一下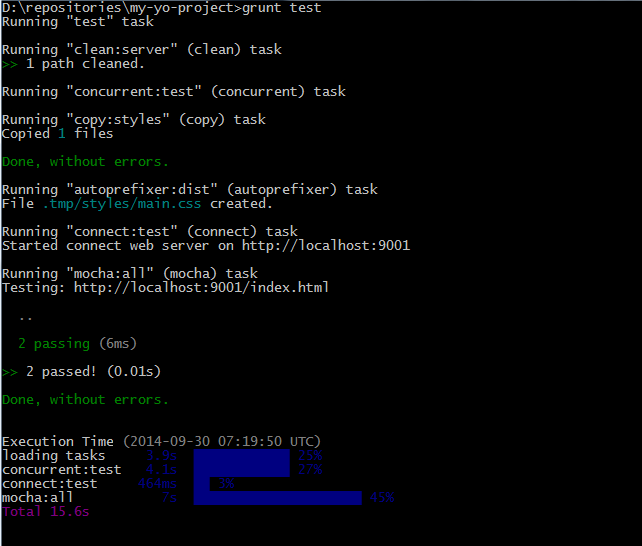
结果和我们预想的一样,成功了,算上我新增的测试用例,两个测试用例都通过了测试。
接下来,写一个一定不会成功的测试,看看会怎样呢
这次我又新增了一个测试用例,这是个一定失败的测试用例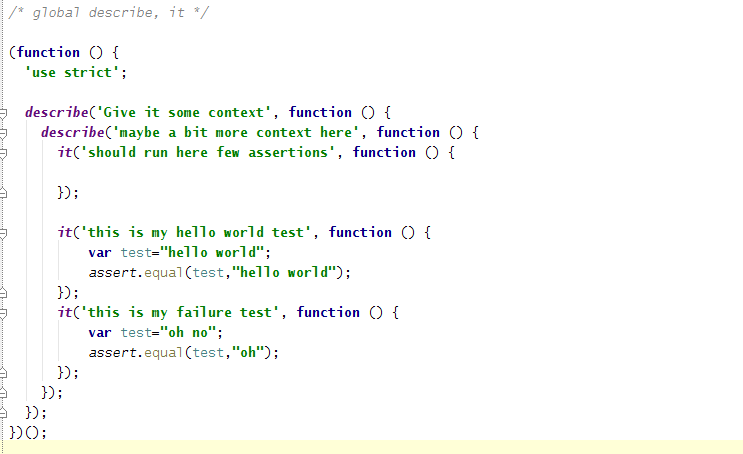
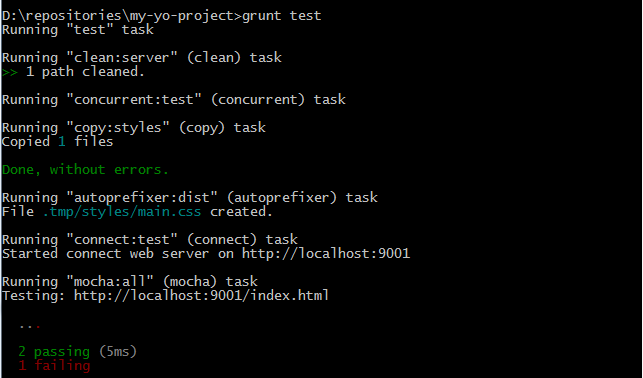
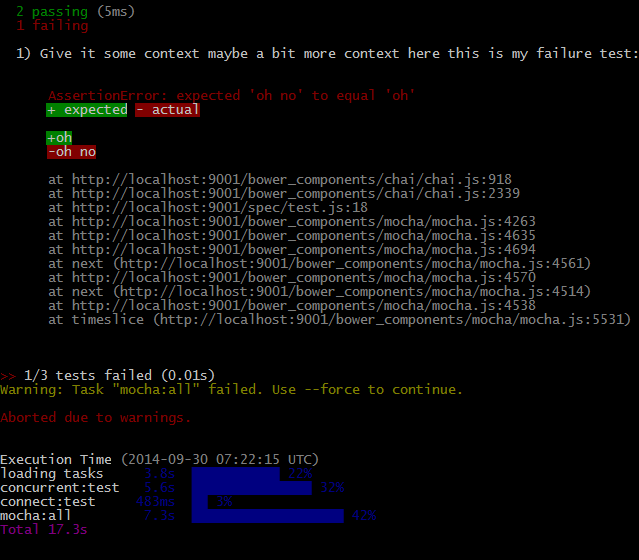
结果如我们预想,失败了,给出了提示信息,“oh no”== “oh”这里有问题,嘿嘿
1/3个测试失败
你现在一定也会写测试用例咯,当然如上实例其实是最简单的,可以去mocha的官方文档上查看更有用的写法哦,现在你可以开始写测试咯~
运行grunt
我们再试一下grunt命令
(以下你只需要运行grunt就行了,他一个命令做了很多事情,我把不同的任务截了图,方便对比)
看看grunt任务中做了什么事情,并对比运行结果~
grunt 就是这个default任务
grunt命令实现任务功能详解
jshint:会帮你检查JavaScript代码中的错误,和一些潜在的问题
gruntfile.js: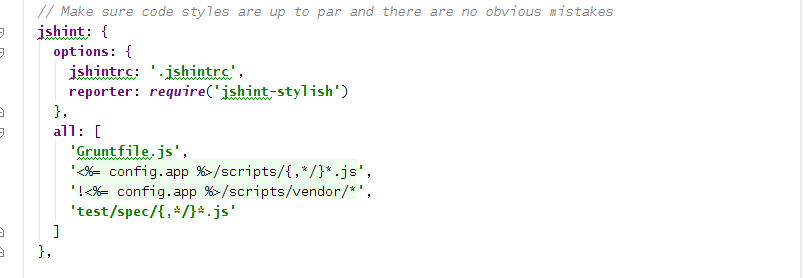
运行结果: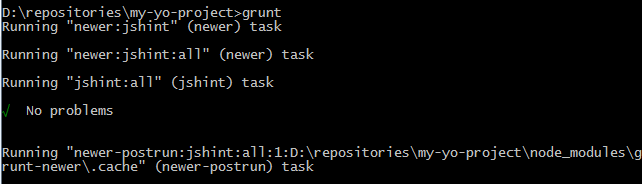
test:就是测试你写的测试用例(此处使用的是mocha框架)
gruntfile.js: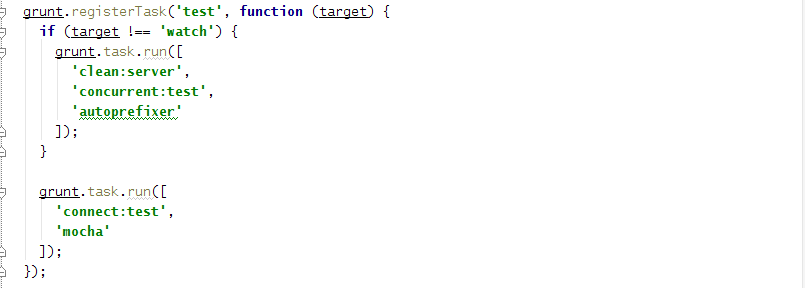
运行结果: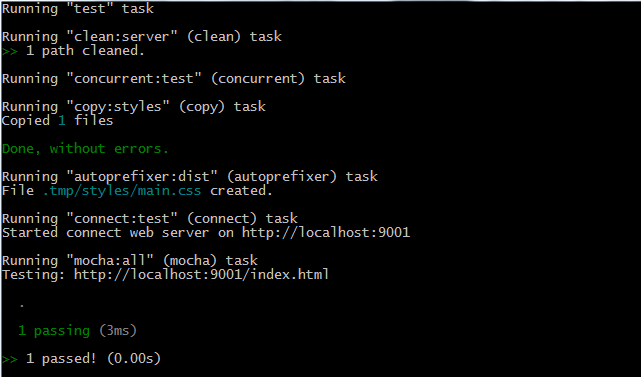
build里面做了很多事:
gruntfile.js: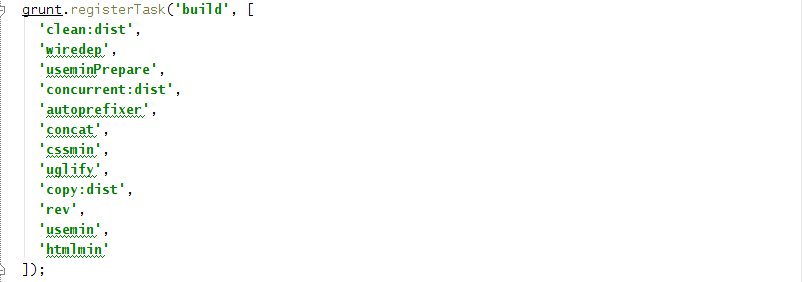
clean:dist
dist文件夹:是一个生成用于发布的项目的文件夹
clean:dist 作用就是清空这个文件夹
wiredep:这个你一定知道了,之前用过啦,将bower的js依赖文件写入index.html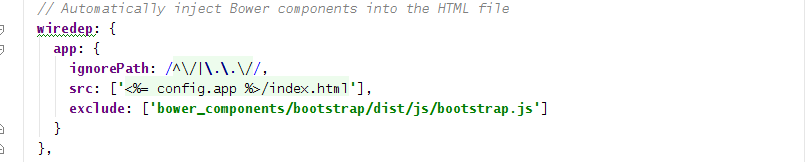
useminPrepare:分析文件并且完成配置,然后交给 usemin 来处理,但是多个入口文件时,无法自动完成配置,还是手动配置可靠,优点:如果用了require.js 会自己配置 build/static/scripts/vendor/requirejs/require.js 文件,方便(虽然我还没有用过require.js)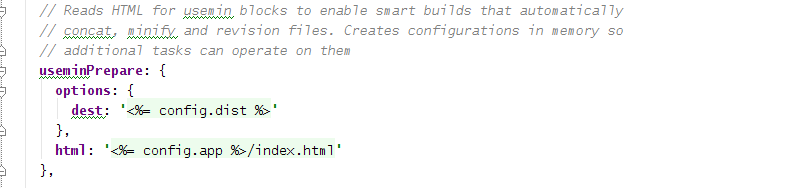
concurrent 配置一些并行的任务,
concurrent:dist 这里做了些事:复制了样式表,压缩image和svg
autoprefixer:给样式添加浏览器供应商前缀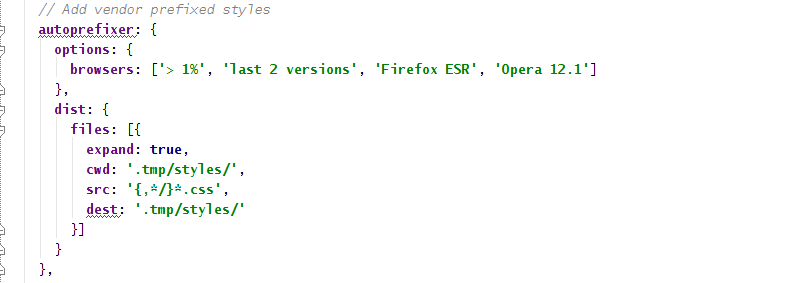
concat:合并文件
cssmin:压缩css文件
uglify:压缩js文件
(自动生成的这部分被注释掉了,如果你不希望使用usemin blocks 这些需要被配置)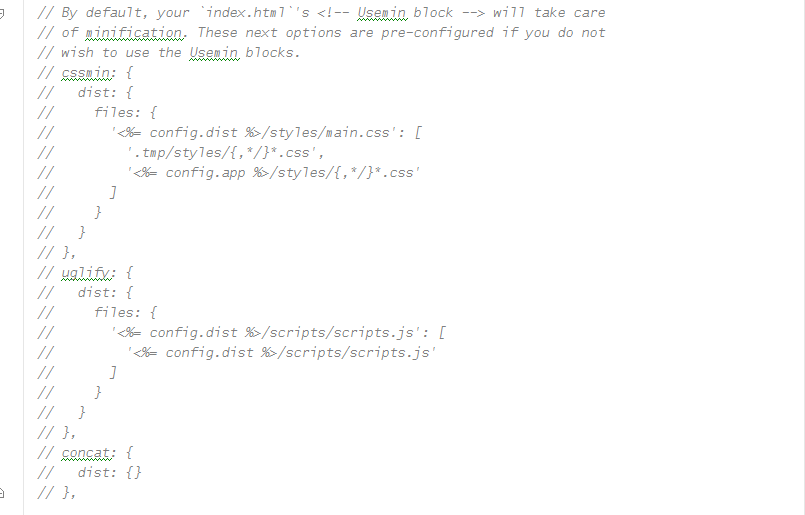
copy :复制一些东西
copy:dist 复制一些文件到dist文件夹中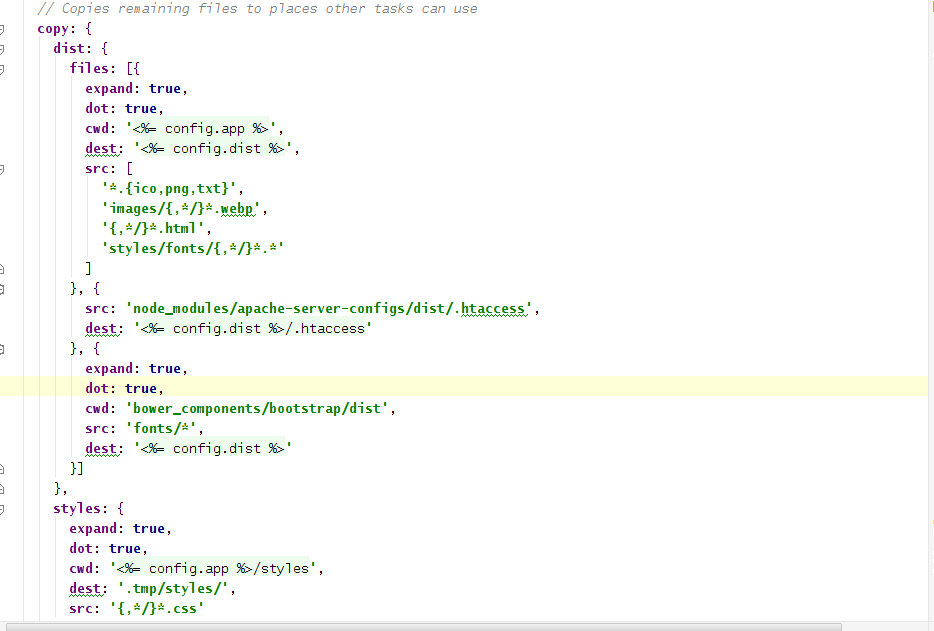
rev:为要进行浏览器缓存的文件重命名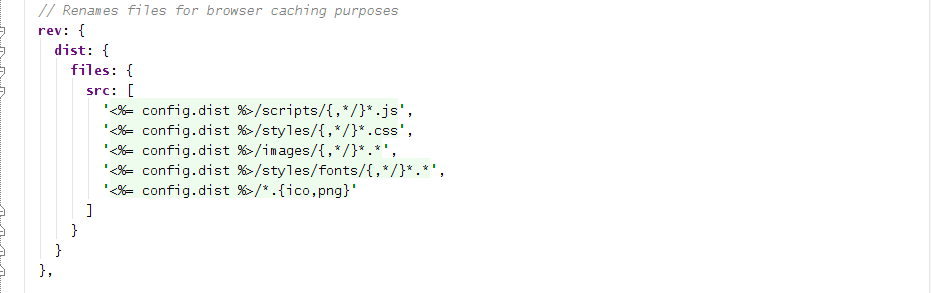
usemin :依据usemin-clock压缩css或js
usemin-block 是像这样的 (详细文档:grunt-usemin)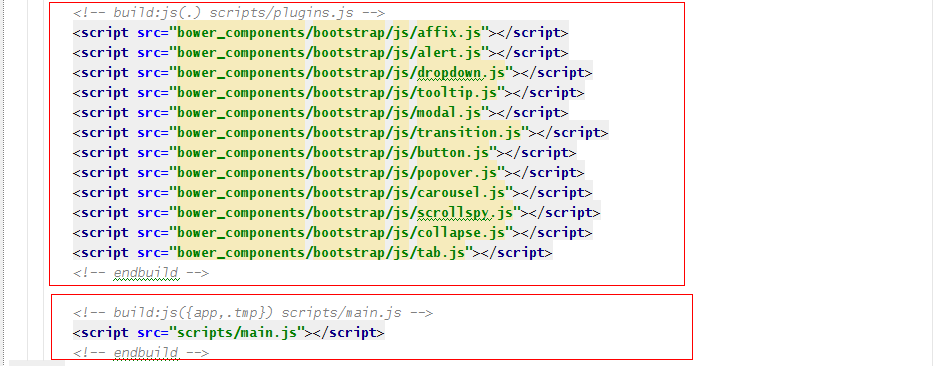
htmlmin : 压缩html文件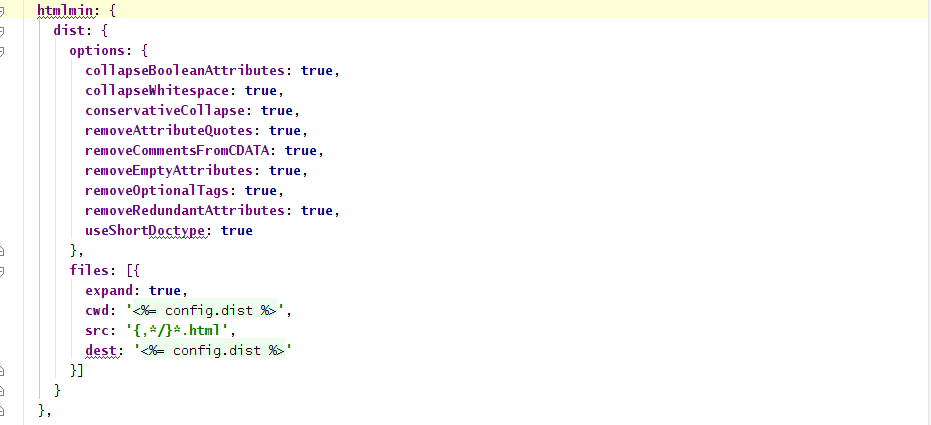
运行结果:
|
|
至此,我们已经成功建立了一个使用yeoman创建的webapp,且分析了,生成的配置文件,你也可以根据需要自己增加一些东西。想了解更多请去Yeoman官方文档看吧,之后我也会更新关于Yeoman制作webapp或其他玩意儿的博文,请关注,O(∩_∩)O。
参考文献:
Yeoman官方文档